Upcycling is a good way to lessen the amount of clutter you have in your basement or garage or wherever it is that you store old stuff that you don’t have use for anymore. It’s what many people do nowadays when they’re doing a remodeling project at home on a budget: Look for something that they can convert to function as a new thing. For instance, turning an old filing cabinet into garden planters.
Gardening is a passion for many, and having a planter in their own backyard is a good way to showcase their gardening skills. A garden planter is a container in which plants are grown as a substitute for planting them on the ground. It is enclosed and usually portable and commonly used for displaying flowers and edible plants.
If you are interested in growing your garden but don’t have enough real estate in your backyard, then a garden planter can help you out. If you have an old filing cabinet or you know someone in the neighborhood who has, get your hands on them and begin with your gardening project. This article will teach you how to make a DIY planter by upcycling your old file cabinets into garden planters.
Remove drawers and drill holes for drainage
Pull out the drawers. Most filing cabinets drawers are removed by fully extending them and then lifting them up. Once you pull the mechanism out, you will stop at some point. Look for the tab on the mechanism. Lift it and the drawer will completely slide off of the cabinet.
After removing all the drawers, check if you can reuse the cabinet hardware that it has. Some handles and knobs just need to be cleaned and you can use them again should you need to replace cabinet hardware somewhere in the house.
Use an electric drill to make six 10 ½ inch drainage holes in the back of the planter. This will serve as the base of your planter.
Sand loose paint and rust spots
Next thing you should do is to sand loose paint and spots with rust. Use sandpaper to do this. Once you’re done with the rust spots, sand the entire cabinet lightly. This will help paint adhere to the cabinet’s metal. Finish by wiping the cabinet with a damp piece of cloth to remove dust.
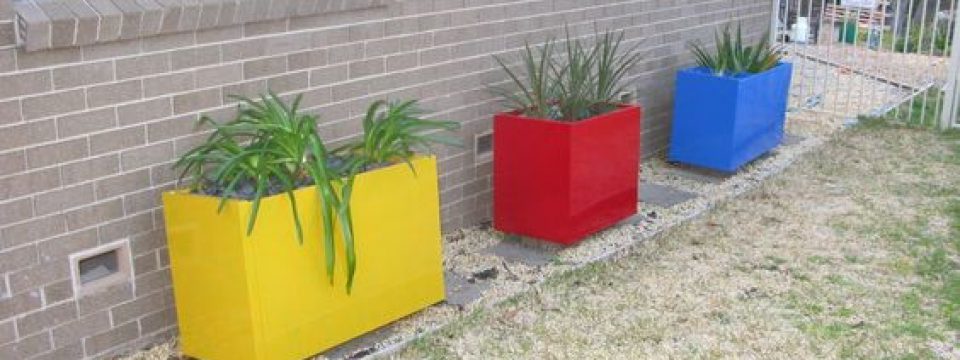
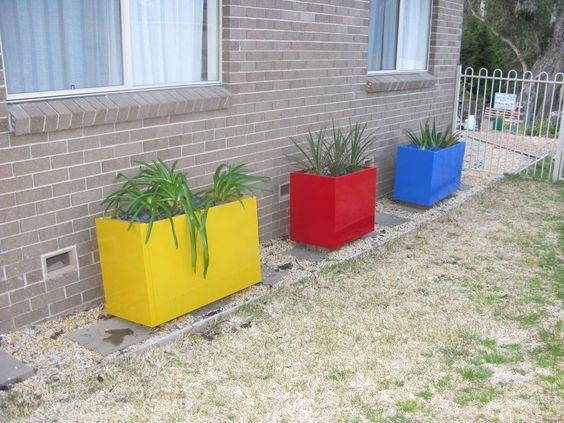
Paint the cabinet
Apply two coats of spray paint to the outside of the cabinet. Make sure that you thoroughly cover all the edges and corners. You may use a primer to make sure that your paint sticks. Paint the entire inside of the cabinet as well. You can also check out Magnificent Hardware store’s blog posts to learn more about home improvements and DIY projects.
Site the planters
You don’t need to elevate the planters if you’re using it on a deck or a patio. If it will be placed on grass or soil, you have to raise it using bricks or rocks to prevent rust. Try to keep it level if possible.
Install casters
Installing casters on your new planters is optional. If you want to move the planters easily, then it is advisable that you do. Look for stainless steel casters so it won’t rust.
Fill it with soil
Fill your new planter with a 50/50 blend of compost and high-quality potting soil. You can throw in some organic fertilizer if you want. Remember to measure how much soil you need in order not to add excessive weight to your planter. After this, you can now plant on your new cabinet planter.
Summary
Upcycling your old file cabinets into garden planters is a solid budget saver. You’ll find it fulfilling once you’ve done it too. DIY repurposing projects are always a delight to do, especially if it improves your gardening.
1 thought on “DIY Planter: Upcycling Your Old File Cabinets Into Garden Planters”